
How to Choose the Right Elevator Guide Rail Bracket?

Choosing an Elevator Guide Rail Bracket is not just a matter of matching holes on a drawing. The bracket connects the guide rail to the building structure, so its fit and support affect alignment, stability, and installation quality. Small details matter. Rail profile, elevator type, expected loads, bracket spacing, and mounting surface all deserve attention. A bracket that suits one shaft may not suit another. Fit comes first.

Start by checking the elevator manufacturer’s specifications and the rail dimensions. Then confirm the bracket material, adjustment range, fastener arrangement, and compatibility with the wall or steel support. Concrete, masonry, and structural steel may require different mounting approaches. Corrosion exposure matters, too, especially in damp or poorly ventilated areas. Do not assume a heavier bracket is automatically the safer choice. Its capacity must match the system design and the supporting structure.

Installation conditions can change the decision. Shaft space may be tight, and small alignment errors can complicate rail installation. Ask suppliers for clear drawings, material details, and documented load information, then have qualified professionals verify the selection against project requirements. Even experienced teams can overlook a simple clearance issue. That is worth checking twice. This guide explains the main selection factors, common questions to ask, and practical signs of a mismatch. It cannot replace project-specific engineering review. Some details depend on the site, and that is where careful measurement matters.
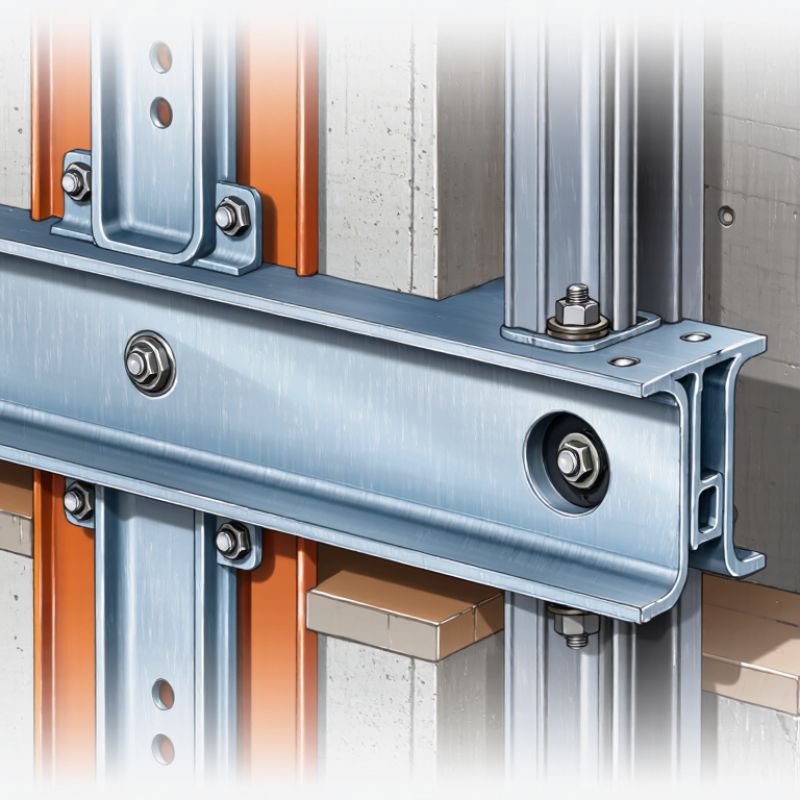
How to Choose the Right Elevator Guide Rail Bracket?

Understanding the Role and Types of Elevator Guide Rail Brackets

How to Choose the Right Elevator Guide Rail Bracket?
Understanding the Role and Types of Elevator Guide Rail Brackets

Guide rail brackets secure the rails to the hoistway structure and help keep the car and counterweight aligned during travel. They transfer lateral forces into the building, so bracket spacing, fastener condition, and support strength matter. A loose connection can contribute to vibration, noise, or uneven movement. Brackets cannot correct rails installed out of plumb.

Common arrangements include wall-mounted, adjustable, and steel-support brackets. The right type depends on the rail profile, shaft dimensions, wall material, and installation method. Adjustable designs allow small alignment changes, but they cannot compensate for weak concrete or misplaced inserts. Check equipment drawings against actual site conditions; dimensions that appear close may still be unsuitable. Details matter.

Tips: Confirm the rail and bracket specifications together. Inspect anchors, welds, and clearances, then verify alignment with appropriate measuring tools. Record findings before the shaft is enclosed. If support strength or load information is uncertain, consult a qualified elevator professional. Field experience helps, but assumptions can persist longer than they should.

Identifying Elevator Loads, Rail Dimensions, and Operating Conditions

How to Choose the Right Elevator Guide Rail Bracket?

Choosing a guide rail bracket starts with the forces it must resist. Record the rated car load, counterweight arrangement, rail spacing, and expected operating speed. Starting, braking, and uneven passenger loads can all affect rail forces. A bracket selected only by appearance may not provide enough support.

Measure the rail profile carefully, including its width and thickness. Check the proposed bracket’s fit, adjustment range, fixing points, and the strength of the supporting wall or steelwork. Small details matter. Compare these measurements with current elevator drawings and installation documents; an older bracket is not automatically a reliable reference.

Tips: Note humidity, temperature changes, vibration, and possible corrosion around the mounting area. These conditions can affect materials and fixings over time. Keep maintenance access in mind, too. Have a qualified elevator professional verify load ratings, anchorage, bracket spacing, and compatibility with the complete rail system. A tidy calculation can still miss a site detail, so document assumptions and check them during installation.

How to Choose the Right Elevator Guide Rail Bracket? — Identifying Elevator Loads, Rail Dimensions, and Operating Conditions

Selection factor Information to identify Illustrative data or examples How it affects bracket selection Verification required
Elevator load Rated car load, counterweight arrangement, and the loads transferred to each guide rail Passenger elevators commonly have rated loads such as 630, 1,000, or 1,600 kg. These figures describe car capacity, not the load on an individual bracket. Higher loads and different suspension arrangements can increase guide-rail reactions. Brackets and their fixings must be selected for calculated reactions, not rated capacity alone. Obtain rail reaction forces and support loads from the elevator design calculations.
Rail profile and dimensions Rail type, nominal head width, height, foot dimensions, and fixing details Common nominal rail head widths include approximately 70, 75, 89, and 90 mm. Exact dimensions and profile designations vary by rail type and applicable specification. The bracket must match the rail profile and provide compatible clip or fastening geometry without obstructing the guide shoe or rail joint. Check the rail drawing and the bracket’s specified compatible profiles; do not select by head width alone.
Rated speed and operation Rated speed, starts per hour, travel height, and expected duty A low-rise passenger lift may operate at about 1 m/s; higher-speed installations require a project-specific assessment of dynamic effects. Speed, duty, and travel can affect vibration, dynamic forces, and alignment requirements. They may influence bracket strength, stiffness, and spacing. Use the project’s design loads and applicable elevator and building requirements.
Preliminary bracket spacing Vertical distance between successive rail supports About 1.5–2.5 m may be used as an early layout range in some installations; this is not a universal or approved spacing. Closer supports may be needed for higher loads, greater dynamic effects, rail-joint locations, or less rigid supporting construction. Determine final spacing by calculation using rail properties, loads, fixing capacity, and project requirements.
Supporting structure Concrete, structural steel, masonry, or another approved substrate; wall thickness and condition Record substrate strength, edge distances, embedment depth, and the locations of reinforcement or structural members. The bracket is only as reliable as its anchors and supporting structure. A bracket suitable for concrete may not suit a steel beam or masonry wall. Check anchor design, substrate capacity, installation details, and any required pull-out or inspection procedures.
Operating environment Temperature, moisture, corrosion exposure, dust, and indoor or outdoor location Dry indoor shafts differ from damp, coastal, or chemically exposed environments. Environment affects material, coating, corrosion protection, and the long-term condition of fasteners and rail connections. Specify suitable materials and protective finishes for the actual exposure conditions.
Installation and alignment Bracket adjustment range, rail plumbness, shaft tolerances, and joint arrangement Confirm that the bracket allows the required adjustment while maintaining secure rail clamping and access for installation. Insufficient adjustment can make rail alignment difficult; poor clamping or joint placement can affect smooth operation. Review installation drawings, rail alignment tolerances, and manufacturer instructions for the selected components.

Design note: The examples are for preliminary selection guidance only. Final bracket type, spacing, fasteners, and rail compatibility must be verified by the elevator designer or qualified engineer against project-specific calculations, applicable codes, and the exact rail and bracket specifications.

Comparing Bracket Materials, Designs, and Mounting Methods

How to Choose the Right Elevator Guide Rail Bracket?
Comparing Bracket Materials, Designs, and Mounting Methods

Bracket material should suit both the shaft environment and the loads it must carry. Painted or galvanized steel is common in dry interiors, while moisture or cleaning chemicals may call for more corrosion-resistant finishes. Stainless steel can help in demanding environments, but it is not automatically the best choice. Check compatibility with nearby metals and the project specification. Small details matter.

Design affects how accurately the guide rail can be positioned and how securely it stays there. Slotted or adjustable brackets allow installers to correct alignment during setup. Fixed brackets may be simpler when support locations are precise. In either case, the bracket must provide adequate stiffness; adjustment should not leave the rail vulnerable to movement or vibration. A useful check is whether the proposed bracket suits the rail profile, spacing, and expected forces—not just whether its holes line up.

Mounting methods depend on the supporting structure. Concrete supports typically use specified mechanical or chemical anchors, while steel supports may use bolted or welded connections. The chosen connection must suit the substrate and be verified against project requirements. During installation, inspect the support surface, confirm rail alignment, and tighten fasteners to the specified torque. One easy assumption to miss: a strong bracket cannot compensate for a weak or uneven wall.

Checking Compatibility with Rails, Shafts, and Safety Standards

A guide rail bracket must match the rail profile, shaft structure, and forces specified for the lift—not just the bolt holes. Check the rail’s dimensions and fixing method against the bracket drawing, then verify bracket spacing and allowable loads in the elevator design documents. Small gaps matter. A bracket that sits unevenly can twist the rail or shift loads into the anchors.

Inspect the shaft wall or steel support before choosing fasteners. Concrete strength, embedment depth, edge distance, and corrosion exposure all affect the connection. Confirm the shaft is within the project’s alignment tolerances, and check that the bracket will not clash with car equipment, counterweights, or access clearances. Use the safety code adopted for the project, such as ASME A17.1/CSA B44 or EN 81-20 and EN 81-50; requirements and editions vary by jurisdiction. The U.S. Bureau of Labor Statistics’ 2024–34 occupational projections estimate 6% employment growth for elevator installers and repairers, underscoring the value of clear, repeatable installation checks. A drawing can look right and still be wrong. Recheck measurements on site, and document any mismatch before installation.

Evaluating Installation, Adjustment, and Maintenance Requirements

A guide rail bracket should suit the shaft structure, rail profile, and installation sequence. Check the anchor type, slot range, and clearance for tools before ordering. On site, a slotted bracket can help correct small alignment errors without forcing the rail. But adjustment has limits. If the supporting wall is uneven or the anchor is poorly placed, extra slot travel will not solve the underlying problem. Record rail position and fastener torque at each level, then recheck after adjacent work.

Maintenance access deserves equal attention. Choose a bracket that allows technicians to inspect anchors and detect corrosion or loosening without removing nearby components. Keep adjustment points visible, and avoid arrangements that trap dust or water. Small details matter. The U.S. Bureau of Labor Statistics reported 395 fatal work injuries from falls, slips, and trips in construction in 2022, within 1,069 total construction fatalities. This figure does not measure elevator-bracket risk specifically, but it reinforces the need to plan safe access during installation and service. A practical selection also leaves room for periodic checks. In cramped shafts, that can be harder than the drawings suggest. Keep inspection notes, including any rail movement, because memory is an unreliable maintenance tool.

Skip to content